Are you a bit interested in this little portable knitting machine while afraid you won’t know how to use it? Don’t worry, this machine is exceptionally easy to set up and operate. Follow me.
![Portable Knitting Machine 1](https://anglegrindergears.com/wp-content/uploads/2022/09/Portable-knitting-machine-1.jpg)
1. Take the machine and all the parts out of the box and place it on the workbench
2. Unscrew the four screws on the top of the machine with a suitable hexagonal screwdriver
![Portable Knitting Machine 2](https://anglegrindergears.com/wp-content/uploads/2022/09/Portable-Knitting-machine-2-768x1024.jpg)
3. Attach one bracket each
![Portable Knitting Machine 3](https://anglegrindergears.com/wp-content/uploads/2022/09/Portable-Knitting-machine-3.jpg)
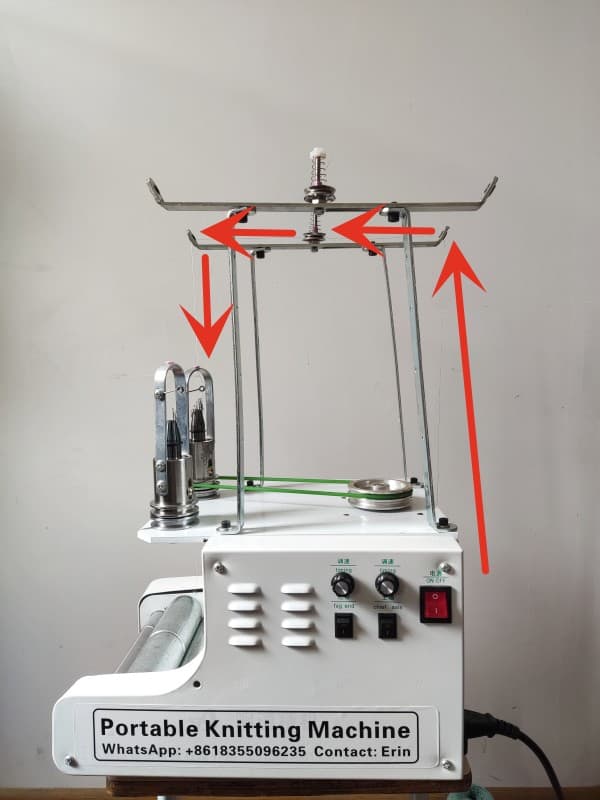
4. Tighten the 2 horizontal brackets from the bottom upwards as shown in the picture
![Portable Knitting Machine 4](https://anglegrindergears.com/wp-content/uploads/2022/09/Portable-Knitting-machine-4.jpg)
5. Fix the tensioner
![Portable Knitting Machine 5](https://anglegrindergears.com/wp-content/uploads/2022/09/Portable-Knitting-machine-5.jpg)
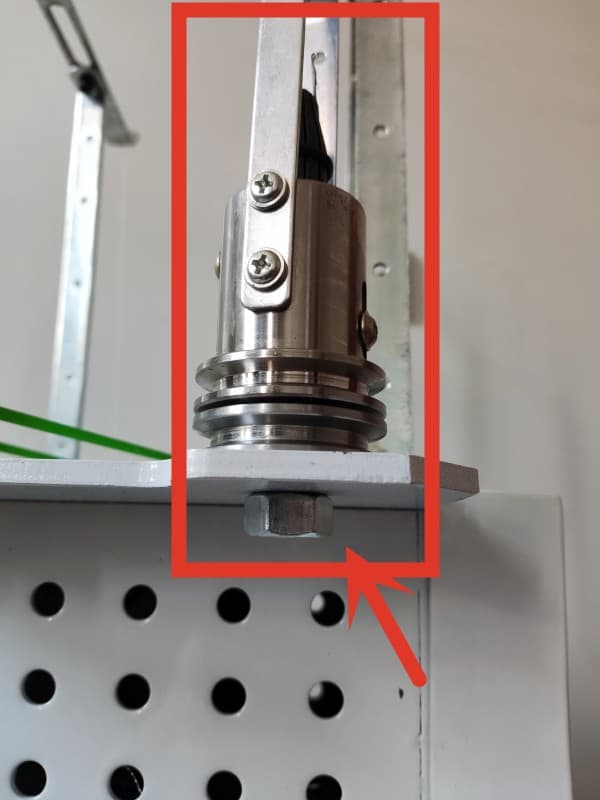
6. Attach the head to the machine and tighten the bottom screw
![Portable Knitting Machine 6](https://anglegrindergears.com/wp-content/uploads/2022/09/Portable-Knitting-machine-6.jpg)
7. Attach the round belt, 2 heads, same way
![Portable Knitting Machine 7](https://anglegrindergears.com/wp-content/uploads/2022/09/Portable-Knitting-machine-7.jpg)
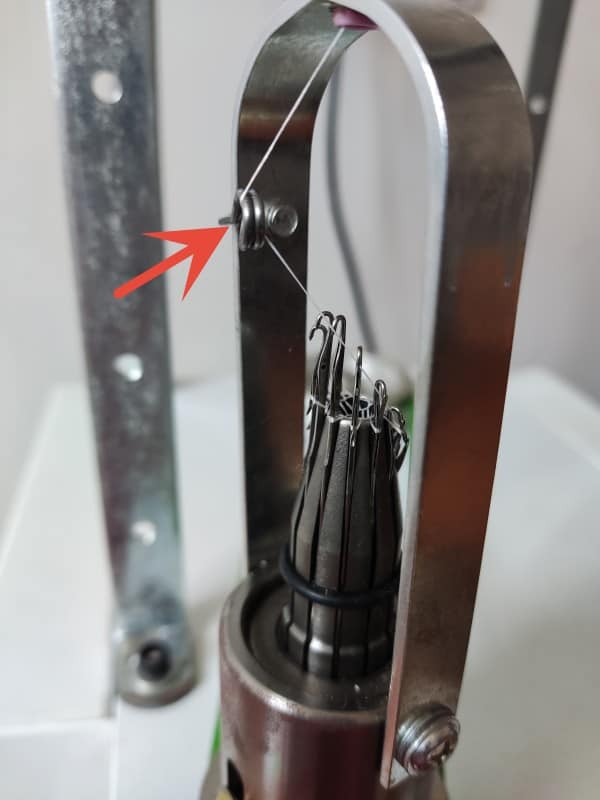
8. Adjust the loop to an approximate position
![Portable Knitting Machine 8](https://anglegrindergears.com/wp-content/uploads/2022/09/Portable-Knitting-machine-8.jpg)
9. Arrange the yarn according to the path shown
![Portable Knitting Machine 9](https://anglegrindergears.com/wp-content/uploads/2022/09/Portable-Knitting-machine-9.jpg)
10. Adjust the position of the loop again so that it is easy to guide the yarn through the needle.
This step requires some patience to try and adjust to find the most suitable position.
![Portable Knitting Machine 10](https://anglegrindergears.com/wp-content/uploads/2022/09/Portable-Knitting-machine-10.jpg)
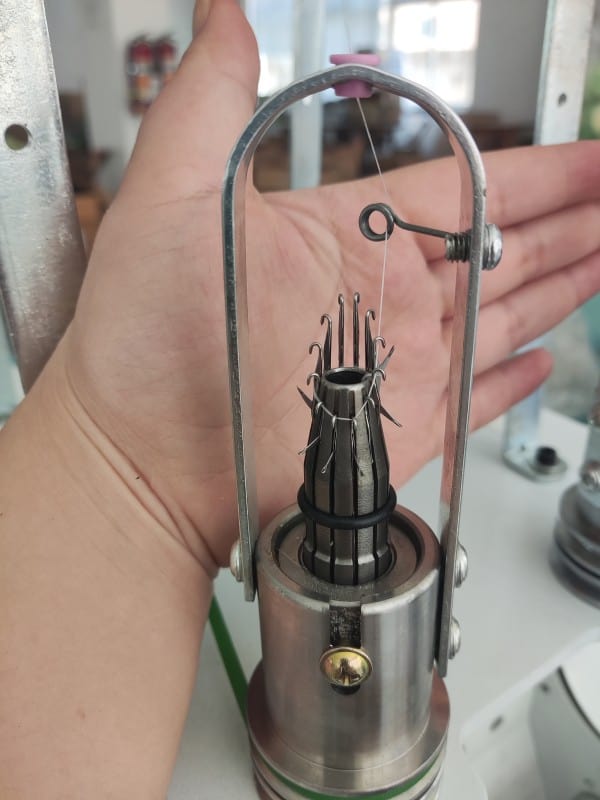
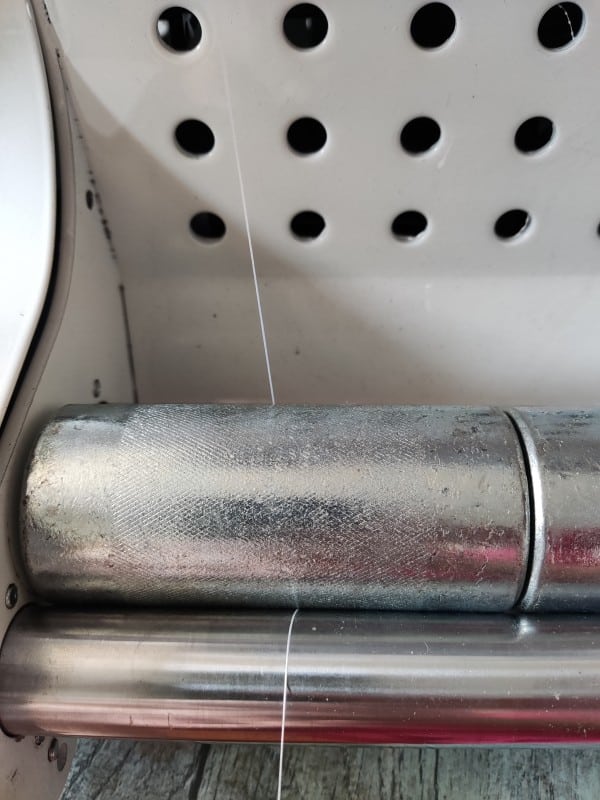
11. Pass the yarn through the hook of each needle and make a complete loop
![Portable Knitting Machine 11](https://anglegrindergears.com/wp-content/uploads/2022/09/Portable-Knitting-machine-11.jpg)
12. Press the yarn under the head onto the wheel
![Portable Knitting Machine 12](https://anglegrindergears.com/wp-content/uploads/2022/09/Portable-Knitting-machine-12.jpg)
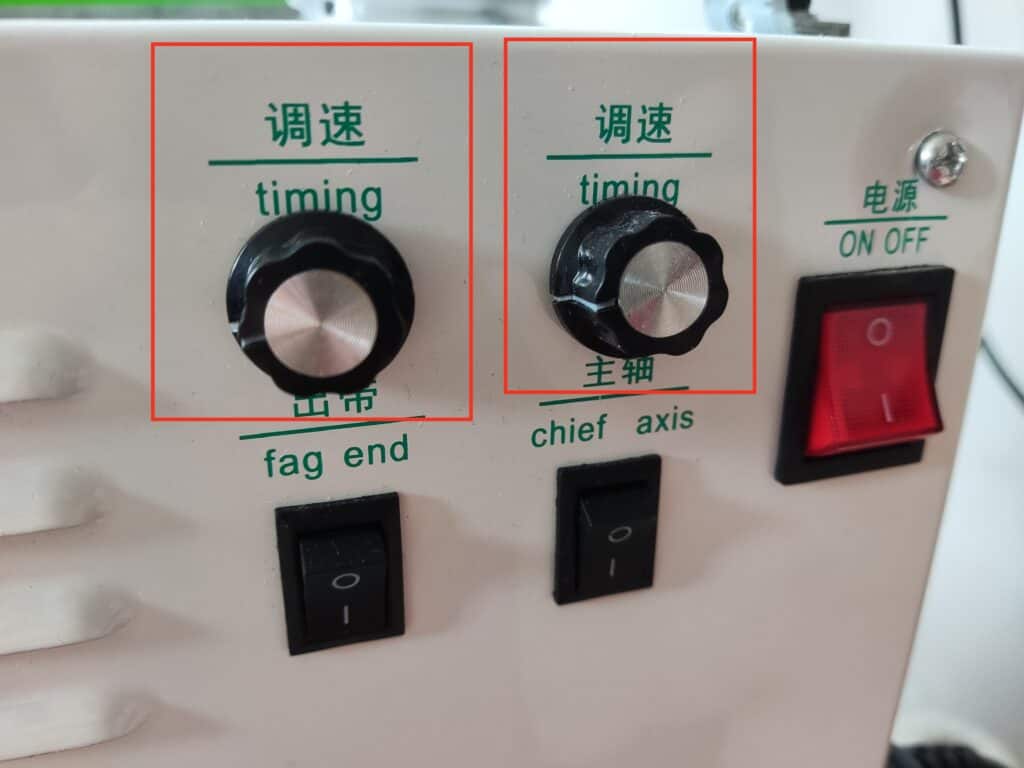
13. Adjust the white line on the two speed buttons towards the lower left corner to low speed, with the power off.
Adjust the speed of the thread wheel with the left knob and the speed of the machine head with the right knob.
![Portable Knitting Machine 13](https://anglegrindergears.com/wp-content/uploads/2022/09/Portable-Knitting-machine-13-1024x768.jpg)
14. Plug in the power supply and turn on the switch
Then the machine starts to run.
The rope size is based on head model. If you wan to change the rope size, only need to change the heads.
![Portable Knitting Machine 14](https://anglegrindergears.com/wp-content/uploads/2022/09/Portable-Knitting-machine-14.jpg)
What rope does it produce?
Please refer the the following chart. It can produce both elastic belt for mask . Well, non-elastic hollow belt such as polypropylene rope, cotton rope, etc. is no problem.
![Non Elastic Rope](https://anglegrindergears.com/wp-content/uploads/2022/09/NON-ELASTIC-ROPE.jpg)
![Mask Rope](https://anglegrindergears.com/wp-content/uploads/2022/09/mask-rope.jpg)
One Response
Your blog lightens my day like a beam of sunlight. Thank you for sharing positivity and uplifting words.